Art Workshops: Phoenix Art Space / Online ** currently running

Studio artist Perdita Sinclair has created a series of drawings of imagined creatures for families to download, print out and colour in at home. Share your colourful creations with us via Instagram @phoenix_artspace and don’t forget to use the hashtag #PhoenixFamilyFunAtHome
Colour in at Home / Bird Creature – Click here to download.
Colour in at Home / Cabbage Creature – Click here to download.
Colour in at Home / Snake Creature – Click here to download.
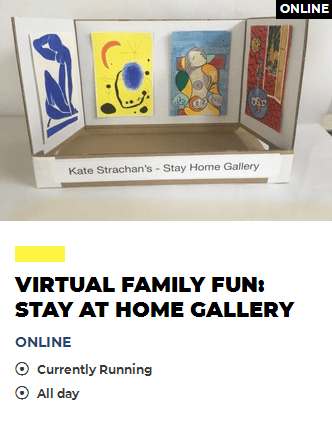
Please share images of your finished Stay Home Gallery with us on Instagram, tagging us @phoenix_artspace and using the hashtag #PhoenixFamilyFunAtHome
Equipment needed: (substitutes suggested in brackets)
A Shoe Box (large cereal box)
White Paper, approx 5 sheets A4
A glue stick
Scissors – large enough to cut card
Masking tape (sellotape)
Paints, coloured pencils or pens
A printer (thick black marker)

Step 1

Cut Shoe Box (See alternative 1a. for cereal box) If attached, cut lid off from box base along fold. If not, cut off 1 long side of lid. Open out box base or cut down corners of sides to open up. Cut off one long side of box.
Step 1a

Cereal Box Alternative: Cut around 3 sides of base of cereal box about 4cm up from bottom, but leave 1 large side attached. Cut down centre of detached large side, then open up and follow picture of how to cut both thin sides into sections to form a larger base.
Step 2

Re-attach lid to side of box. With box lying on it’s remaining long side push lid in to overlap and attach with tape on the back and sides – you may need to flatten out or trim the 2 short sides to neaten the edges.
Step 2a

Cereal Box Alternative: Fold a 3rd of large attached side flat for base and 2 thirds up for back wall. Trim top to a straight line. Attach side walls to base to form a box shape.
Step 3

Cover back and side walls with white paper. Print out (or write) your name and Stay Home Gallery along the long side of an A4 sheet of paper. Stick your gallery title to the front side of lid.
Step 3a

Cereal Box Alternative: Cover side and back walls with white paper and put your gallery name onto the front.
Step 4

Attach side walls. Fold in side walls so they slightly cross over the lid sides and mark where they meet. Cut a slit about 2cm in the side of lid and slot together so it holds the side walls slightly at an angle.
Step 5

Create your Art. Fold an A4 sheet of paper into 4 and cut into 4 postcard sized pieces – thick paper or card would be best if painting. The gallery fits 4 if done portrait way up. Create your own mini pictures, or ‘recreate’ some of your favourite Artists work.
Step 6

Now hang your exhibition! Decide which work looks best in which order – this bit is called curating an exhibition. You could print or write labels with titles of the work, or add frames? Stick the art in the gallery with glue, or blue tack on the backs if you want to make more art and use it again.
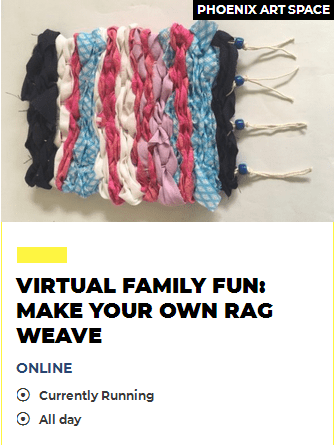
Follow the step-by-step instructions below to make your own Rag Weave.
Please share images of your finished Rag Weave with us on Instagram, tagging us @phoenix_artspace and using the hashtag #PhoenixFamilyFunAtHome
Equipment needed:
- A rectangle of thick card (approx. 16x24cm) or double thickness cereal box glued together
- Scissors
- A ball of string (about 4 metres)
- Fabric scraps which could include: J cloth, duster, old pillow case or clothing
- Pencil and ruler
- Beads or a straw

Step 1

Make the Card Frame. Mark 2cm spaces along the edge of both short ends of the card, then draw a line 2cm in from each edge. Along this line measure and mark first 1cm then 2cm spaces until another 1cm is left at the other end. Draw triangular zig zags along both edges using the marks. Cut out carefully.
Step 2


String on Frame. These are called warp threads. Leaving about 10cm of spare string, tie a knot around the first point of one end then pull string through the first V down to the opposite V at the bottom, then go around the back and up to the second V at top, continue going around until the last point at the bottom. Tie around point and cut string, again leaving 10cm spare.
Step 3

Cut fabric strips approx 2-3cm wide and at least 25cm long. You can make longer strips from narrow fabric by cutting up and down without cutting it off at the end.
Step 4
Weaving. These are called weft threads. Take a fabric strip and weave it under and over each string from one side to the other. Pull through to the end of the strip and then return the other way. After a few rows gently push up the strips and continue, adding strips by tying them together.
Step 5

Try not pull the sides too tight. Continue weaving until you reach the bottom, then turn over the frame and cut the strings in the middle of the back.
Step 6

Carefully turn the frame back over to the front and tie all the string (warp) ends together in pairs along both ends.
Step 7

Remove card frame. Tuck in fabric knots and one line of strings.
Step 8

Turn weaving over to reveal the other (neat) side. Add beads or cut straws to the loose strings at one end and secure with another knot. Well done you have completed your rag weaving piece! Use it as a table mat, to decorate any surface at home or hang it on your wall or in your window.
